
HobbyMaker guest, Lisa Grzesiczek leads us through some suggestions of mindful crafts for when you just don’t know where to start.
Life feels busy these days, doesn’t it? Between work, family, notifications, endless to-do lists and the pressure to always be doing something, it’s easy to feel like your mind is constantly racing ahead of you.
That’s where mindfulness comes in.
Mindfulness doesn’t have to mean sitting cross-legged in silence for an hour. Sometimes it’s as simple as getting lost in a creative activity, focusing on the colours, shapes and textures in front of you, and giving your busy brain a chance to switch off for a while.
When we’re crafting, our attention naturally settles into the present moment. We stop worrying about tomorrow’s problems or replaying yesterday’s conversations and instead focus on what we’re creating right now. It’s a chance to slow down, relax and recharge.
You don’t need to be artistic or make something perfect. Mindful crafting is about enjoying the process, not the finished result. It’s about taking a little time for yourself, reducing stress, boosting your mood and reconnecting with your creativity.
So, whether you have been crafting for years or haven’t picked up a paint brush since school, here are five mindful crafts that can help you slow down, unwind and enjoy a little creative calm.
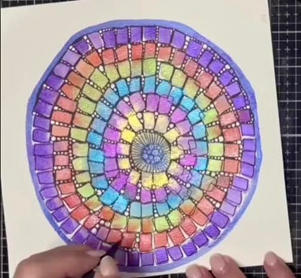
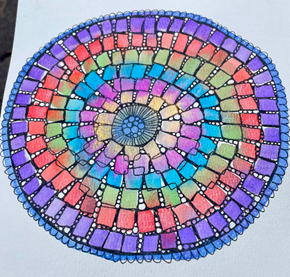
Mindful Mandalas
If you’re looking for a craft that encourages you to slow down and be present, watercolour mandalas are a wonderful place to start.
There’s something incredibly calming about working your way around a mandala, adding colour one section at a time and watching the pattern gradually come to life. Unlike many creative projects, there’s no rush to reach the finish line. The joy comes from the process itself – choosing colours, blending shades and focusing on the small area in front of you.
I often recommend mandalas to people who say they “can’t switch off”. The repetitive patterns naturally encourage your mind to settle, making them a fantastic mindfulness activity. As you paint, your attention moves away from your to-do list and only the gentle rhythm of brush, water and colour.
The best part? There are no rules. Choose colours that make you happy, let go of perfection and enjoy the simple act of creating. You might just find that an hour disappears without a single bothersome thought.
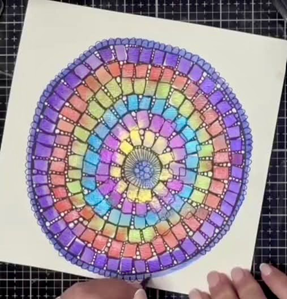
◾Step One – Choosing your first colour can be the hardest step – where do I start?! Take a quiet moment to scan at the colours in the pallet, looking over it several times. Your eyes will naturally be drawn back to one colour more than the others; choose that one to start. Paint a loose circle on your page. It doesn’t have to be perfect, we’re not after perfection, we’re just enjoying being in the moment.
◾Step Two – Choose your next colour. Make one single brush stroke that looks like a block. Continue around the inside of the circle methodically in one direction until you meet your first block again.

◾Step Three – Continue to make circles inside the circles using different colours but the same shape of brush stroke.

◾Step Four – Using a fine-line black pen, or even a black biro, start to outline the blocks of colour that you created. Following them round one row at a time.
◾Step Five – Now that all of the blocks of colour have been outlined, you will be left with blank space, which we will be filling with tiny circles. Colour in the excess space around the circles as you go. Try to move around the circle in rings, you will be less likely to miss blank sections that way.
◾Step Six – Time to make the border more decorative. Draw a scalloped edge around the outermost circle by drawing simple “U” shapes. This really gives a finished look to the mandala.
◾Step Seven – And there we have it! Your completed mandala. Stop and close your eyes, notice how your breathing has slowed, notice any changes in your body’s tension. Take this feeling with you throughout the rest of your day.
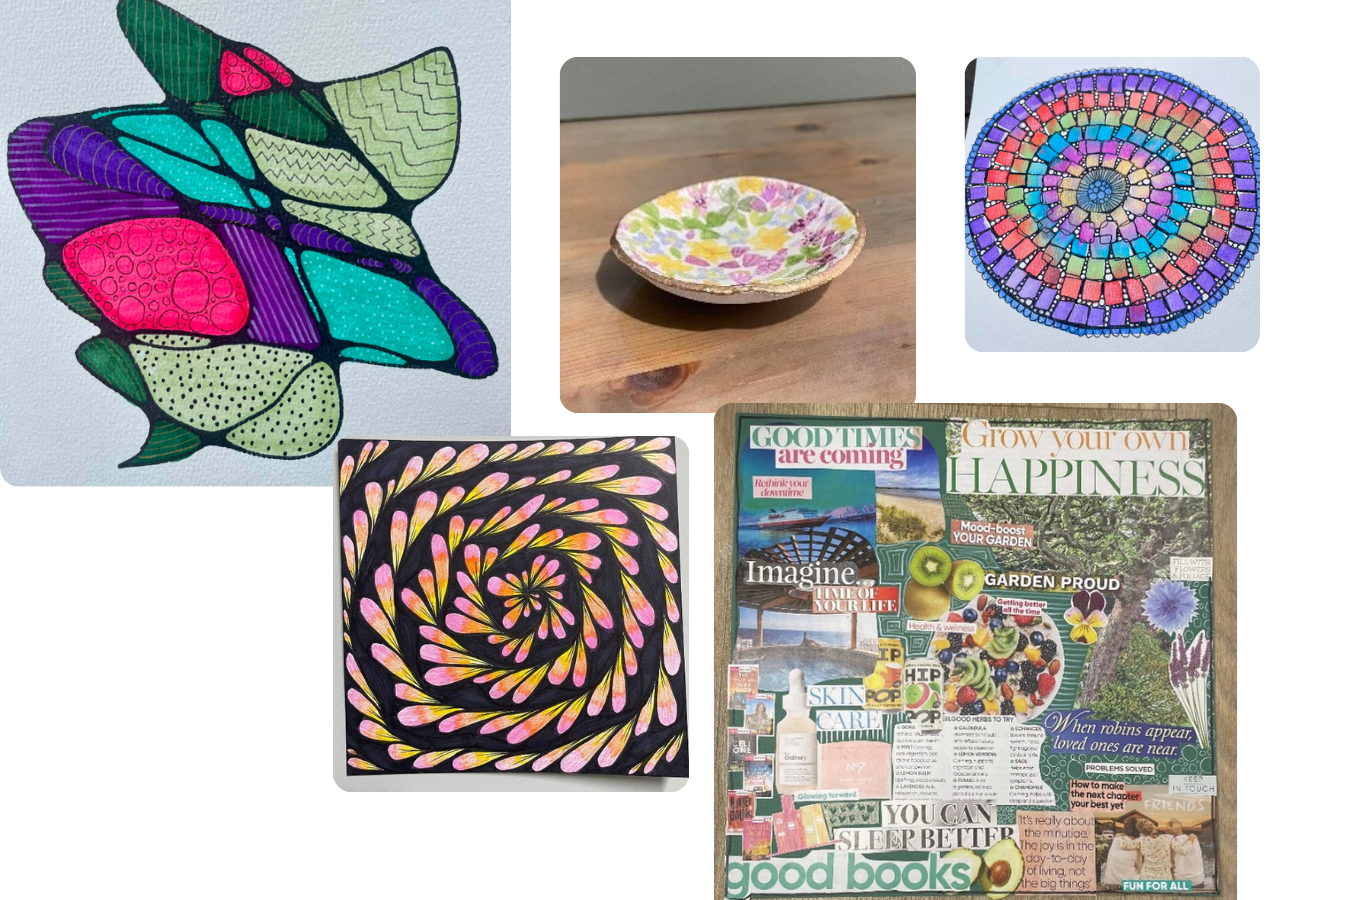
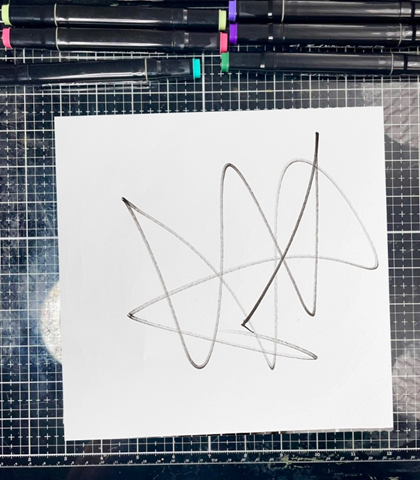
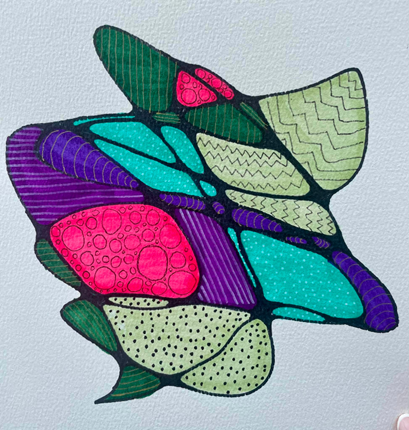
Neurographic Art
Sometimes the hardest part of mindfulness is knowing what to do with all the thoughts buzzing around in your head. That’s where neurographic art comes in. Think of neurographic art as a brain dump with a pen. You start with a free-flowing scribble, letting your thoughts spill onto the page without judgement or overthinking.
As the lines connect and the shapes develop, many people find their mind begins to feel calmer and clearer too. There is no right or wrong way to do it, making it perfect for anyone who wants to release stress, process emotions, and enjoy creativity without the pressure of creating a masterpiece.
◾Step One – Start by closing your eyes, taking a deep breath, and think about something that’s been on your mind, something that’s been niggling you. Using a permanent black marker, take just 30 seconds to “scribble” the niggle” onto the page.
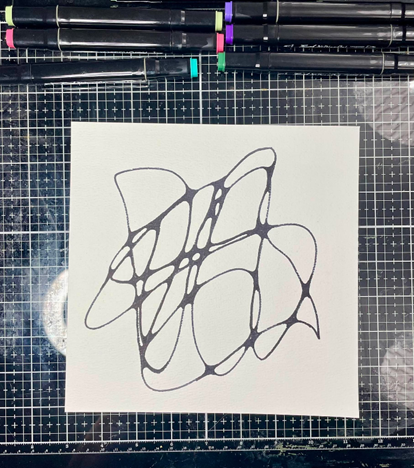
◾Step Two – Next we are going to soften everywhere there are sharp, intersecting angles as the brain interprets these harsh angles as resistance, stress or conflict. Smoothing these angles into curves acts as a physical cue to the brain to reduce stress and resolve any conflict.
In this very simple step , you simply draw a “U” shape wherever the lines intersect. You may need to make the lines thicker to get the required smoothness. Keep going until all angles are rounded, and there are no “jagged” edges left.
◾Step Three – Now it’s time to give some life to the picture with colour. Choose colours that feel right to you, that lift your spirits. Fill in each of the shapes that you have created. I used alcohol markers here, but you can use whatever you have to hand.
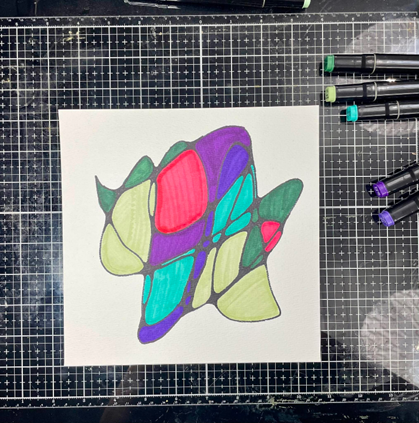
◾Step Four – Once all of the shapes have been coloured, take a moment and a few breaths to look at what you have created. Does your mind feel calmer? If so, stop here! If not, you may want to carry on and add some simple embellishments. I used simple dots, lines, and zig zags to further fill the shapes.
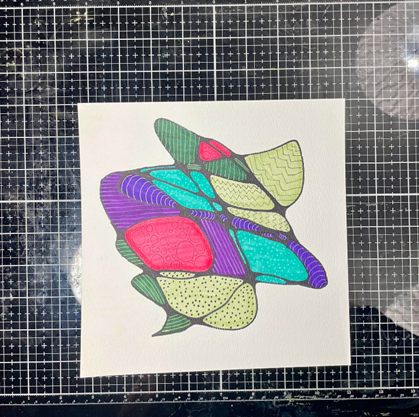
◾Step Five – And here is the finished piece. Completing a piece of Neurographic Art triggers a process called neuroplasticity – the brain’s ability to re-organise itself. By completing this process, You physically simulate the creation of new neural pathways, allowing your brain to break free from rigid thought patterns. It also releases a surge of feel-good hormones like dopamine, serotonin, and oxytocin, while significantly lowering cortisol (the stress hormone).
Neuro Zen Doodle
As someone who loves to mix creativity with wellbeing, I created the term Neuro Zen Doodle to describe a blend of Neurographic Art and Zentangle-inspired pattern work. It combines flowing, organic lines with repetitive doodles and patterns, creating a process that feels both freeing and calming at the same time.
What makes Neuro Zen Doodle unique is that it engages both the creative and logical parts of the brain. The flowing neurographic lines encourage you to let go of perfection and work intuitively, while the repeated patterns give the mind something simple and predictable to focus on. This can help quiet mental chatter, reduce overwhelm, and bring you firmly into the present moment.
Many people find that as they become absorbed in creating pattern, they enter a natural state of flow where worries fade into the background and time seems to disappear. Theres no right or wrong way to do it, just the simple act of putting pen to paper and seeing where it takes you.
If your mind is busy, stressed, or constantly jumping from one thing to another, Neuro Zen Doodling can be a wonderful way to slow down, switch off, and give your brain a well-deserved break.
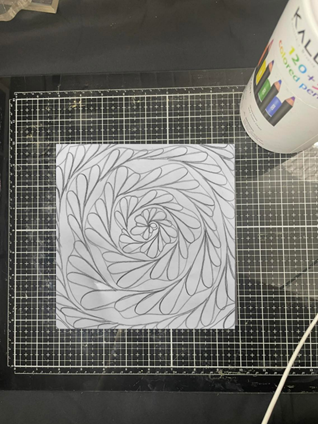
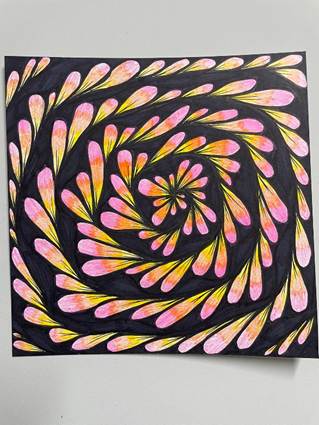
◾Step One – starting with the tip of your pencil right in the centre of the page, draw a wobbly spiral all the way to the outer edges of your paper. Once your spiral gets too big to fit on the paper, keep imagining that you are tracing the spiral off the paper until it meets the corner again, this is how your spirals will fill the corners.
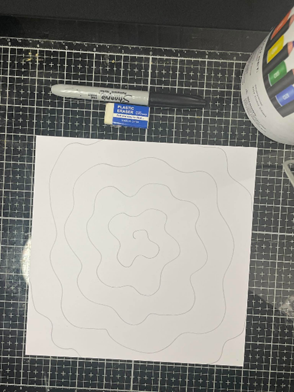
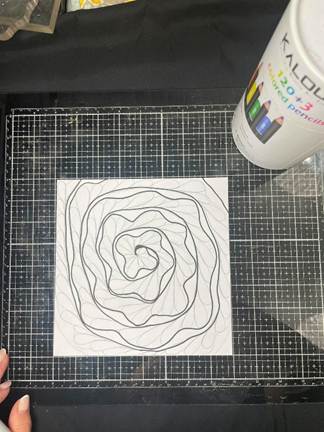
◾Step Two – Starting from that same point in the centre, draw a second line about 1cm distance from the first. Following it around the same spiral, only this time, it should be a much smoother spiral. This will create a spiral border on the page.
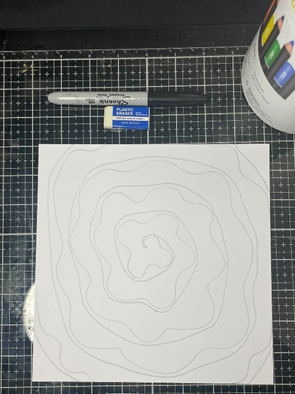
◾Step Three – Starting from the centre, draw a loop, something that looks like a petal. Following the spiral around drawing repeating loops. These do not have to be perfect; they don’t always have to exactly touch the outer edge of the border, and they don’t have to be the exact replica of the one before. Just try to start at the point of the petal, complete the loop, and land back at the start of the petal.
◾Step Four – Using a black permanent marker, overline the spiral border both the inside, and the outside lines.
◾Step Five – Fill in the border with the black permanent marker.
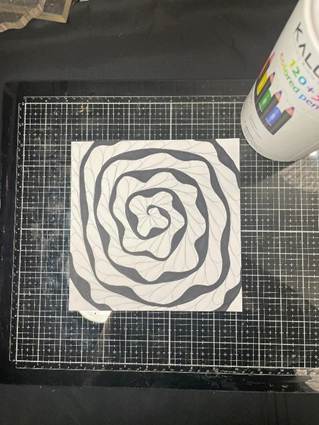
◾Step Six – Next, overline the loops with the black permanent marker.

◾Step Seven – Fill in all the spaces between the loops and the border with the black permanent marker.
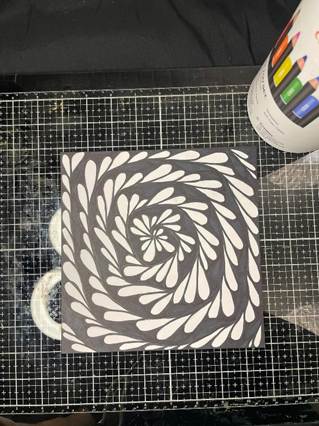
◾Step Nine – If you are happy to leave it black and white, or haven’t got time to colour it now, then stop at this stage, you can always finish it later. Alternatively, using three colours that go well together, take the lightest and colour the first third of each petal starting at the point. Complete all petals in the spiral. Next, using the darkest of your three colours, colour the top third of the petal, the rounded end. For your third colour, the middle shade, colour the middle of each petal and blend into the top and bottom thirds of the petal to give a nice gradient. And you’re done!
Mini Vision Board
A mini vision board is a creative, mindful activity where you gather and arrange small images, colours and words that reflect things, or situations that you would like to improve in your life. These small details represent goals, hopes, and positive changes.
There’s no right or wrong way to arrange it – every choice is personal and meaningful to you.
It works by helping you to clearly name what matters most and bring your intentions to life visually. Focusing on these chosen themes helps you to connect deeply with what you want to grow, shifts your mindset toward positivity, and turns vague wishes into clear, tangible focus points. It’s a beautiful way to stay aligned with your goals, lift your mood, and remind yourself of the progress and goodness you’re working toward – supporting your wellbeing with clarity, purpose and hope.
This is something that can be completed alone, or with a few friends so that you can add even more emotion to the creation of the board. Talking about our goals with others evokes the emotion we would feel if we had achieved the goal already and the brain will get the message loud and clear that this goal you’re thinking about now is one that will bring you true happiness!
◾Step One – Find a couple of lifestyle magazines. If these are not something that you buy on a regular basis, you can pick them up really inexpensively from places like charity shops or car boot sales. (Reuse and recycle!)
◾Step Two – Go through the magazines with a lovely cup of tea or coffee, on your own or with friends. You are looking for images, words and phrases that represent things that you would like to achieve over the coming months. In my example, I used the general theme of “me time”. I have a really busy life, and I sometimes forget that I need to keep myself healthy and happy so that I can continue to look after the people in my life who I love and who rely on me. Some of those things are eating healthier, looking after my skin care, getting out in nature, spending more time with good friends, reading, and going on more holidays!
Cut out all of the phrases, words and images that you deem relevant (you may not use them all on the finished board). Arrange them in theme and start to place each theme on a different area of the backing board.
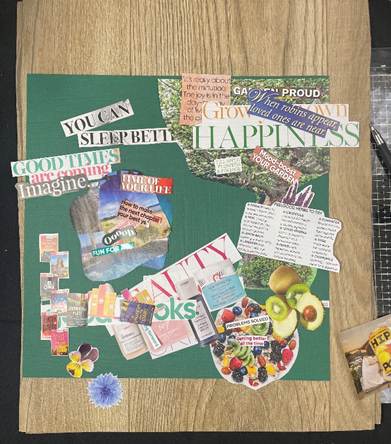
◾Step Three – Once you have them roughly laid out where you want them, simply stick them in place. You can layer images to just expose certain pieces, mix and match individual words to make sentences. As long as it makes sense to you!
As you’re putting each theme together, let your imagination run wild a little. Imagine yourself on that beach, imagine that new car you want, “feel” into that life. Once your brain comes to realise that these are some of the things that will make you happy, it will activate a part of your brain that actively looks for the proof of these things in your life. It will alert you to opportunities and motivations that might have been missed. Think about it – we constantly tell our brain what we DON’T want, and rarely what we do!
◾Step Four – Now they’re all stuck down, you will probably have a few gaps. You can leave the gaps if you want to, or you can fill in any gaps by finding a smaller image to fit them, or simple doodling.
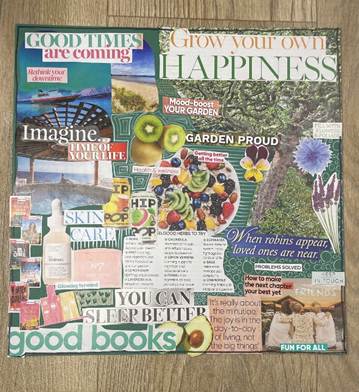
It’s important that you keep the board in sight and look at it often. The more you think about something, the more your brain thinks you want that thing, so it’s time to focus on the positive things you want to achieve in your life!
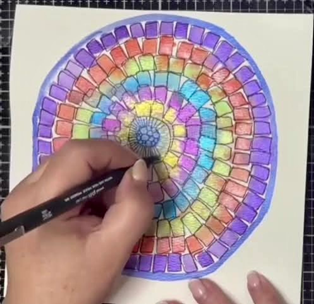
Clay Trinket Dish
Working with clay is a lovely first-time craft project because it is simple, affordable and easy to enjoy as a beginner. You do not need lots of expensive materials or any special artistic experience to get started; just a small amount of clay and your hands are enough to begin shaping something unique. The soft, tactile nature of clay makes it wonderfully calming to work with, encouraging you to slow down, focus on the moment and give yourself a little time that is just for you. That quiet creative time can support mental wellbeing, helping to ease stress, lift your mood and encourage the release of feel-good chemicals such as dopamine and serotonin while reducing stress hormones like cortisol. Sometimes the simplest crafts can bring the greatest sense of peace, and making a clay trinket dish is a perfect example of that.
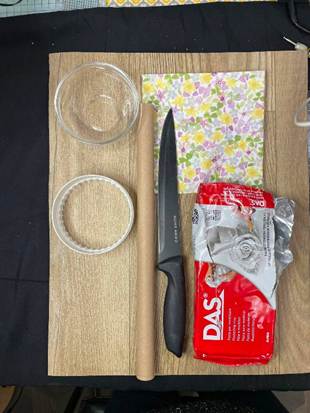
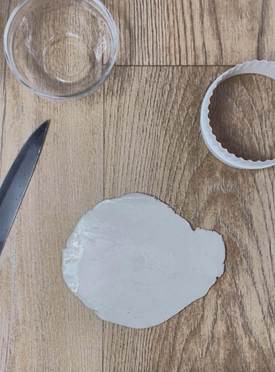
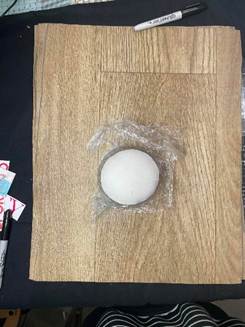
◾Step One – You’ll need a block of air drying clay (any make will do), a sharp knife to cut a slice of clay off the block, a cookie cutter or something to trace around in a shape you like, a decorative napkin, a small bowl that you can use as a form to shape the dish and something to roll out the clay – I used the inside of a cling film roll!
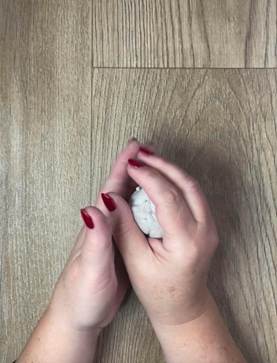
◾Step Two – Cut approximately 2” of clay off the block. (Ensure that you wrap the rest in plenty of cling film and add it to an airtight bag to keep it soft for your next project). Next you want to ‘condition’ the clay, this is just a fancy way of saying warm it up so its easier to work with! Spend at least 5 minutes manipulating the clay, squashing it in several directions and using the warmth of your hands to soften it up. Once you think it’s soft enough to roll you can stop.
◾Step Three – Roll out the clay until it’s big enough to take size of the cutter you have chosen. Top tip – Keep lifting the clay and flipping it over, as well as turning it 90 degrees – this will give you a flatter, smoother slab.
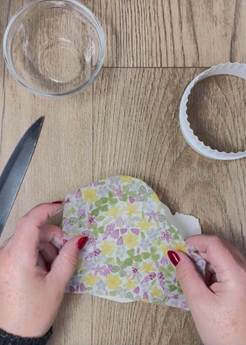
◾Step Four – Laying down the napkin is simple, you just need to remember to separate the ‘ply’ as you only need the very top layer of the tissue. If you leave underneath layers on, there’s a chance the top one will peel away and it wont stick to the dish properly.
Cut the napkin slightly larger than the shape and size of your cutter and lay it onto the flattened clay.
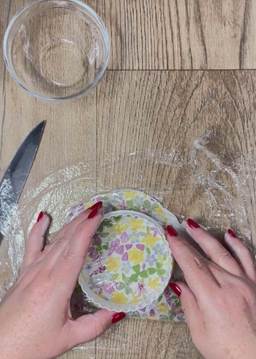
◾Step Five – It’s time to cut the shape of your trinket dish now. Top tip – Place a piece of cling film over the top of the flattened clay before using your cutter, as you press your cutter down through the cling film and into the tissue and clay, it will soften and round the edges leaving a really professional look.
◾Step Five – Carefully remove the cutter and the cling film, and using your sharp knife, run it underneath the clay to separate it from the surface underneath. Take a little clean water and using just the tip of your finger, dip it into the water and trace around any edges that do not look smooth.
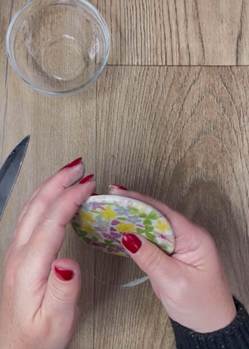
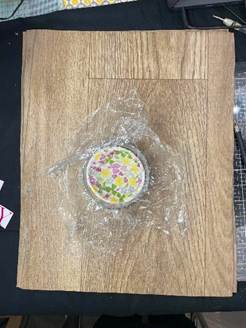
◾Step Six – The pot is now ready to take a shape. I placed the same cling film that I used in the cutting step (Reuse and recycle!) and laid it into a small bowl. This is so the clay does not get stuck inside the bowl.
Next, lay your clay piece into the bowl so that the edges slightly lift all around it, giving it the dish shape. Now its time to let the air do its thing. Air drying clay hardens through evaporation, so once all of the moisture has evaporated, it binds the fibres in the clay tightly together, making a hard surface. Note, once dried out, your piece will shrink slightly and that’s normal! It will need a full 24 hours and sometimes a little more if your room is particularly cool. Half way, flip the dish upside down to help the other side dry.
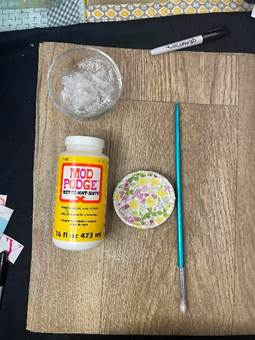
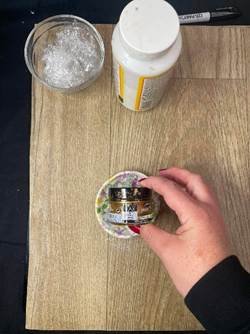
◾Step Seven – Once the pot is dry, it’s time to seal it. This will protect the tissue from being damaged when you drop things into it.
Using Mod Podge, paint a thin layer over the top of the dish and leave to dry. Once that is dry, flip it over and do the same on the underneath. Leave it to dry again. Flip for the last time and finish with one more coat on the inside of the dish, this will make it really durable.
Top tip – If you don’t have any Mod Podge, you can just use a little bit of PVA glue, watered down with some warm water – to a ratio of 90% glue and 10% warm water. Give it a mix and paint on as suggested.
◾Step Eight – I like to make the edge of my pot a bit more fancy, so I used a little gold rub around the lip of the dish, but you can leave it natural, or use other paint mediums like acrylic, gouache, or even metallic sharpies!
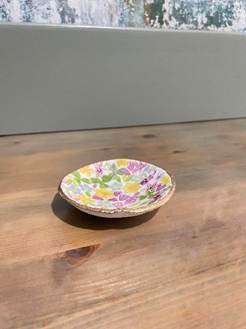
And here is the finished product! I like to use mine for my rings or earring, or even spare change. What will you use yours for?
Going to give one of these a try? Make sure you share what you’ve made in our Facebook group Crafting is my Happy Place and follow us on Instagram and TikTok for more inspiration.